Example Geothermal Heating Projects in Everett

Each example follows a geothermal job from the first visit to start-up: the house, the site, the loop, the indoor work, how long it takes and roughly what it would cost. The size of every system comes from a heat loss calculation for that house, so the home sizes here only give a rough idea.

These are examples, not past jobs, clients or addresses. They are put together from local house ages, the steps each kind of job usually needs and current price ranges, so you know what to expect before you ask for a quote.

Geothermal heat pump in place of an oil furnace in a 1950s house

Example project
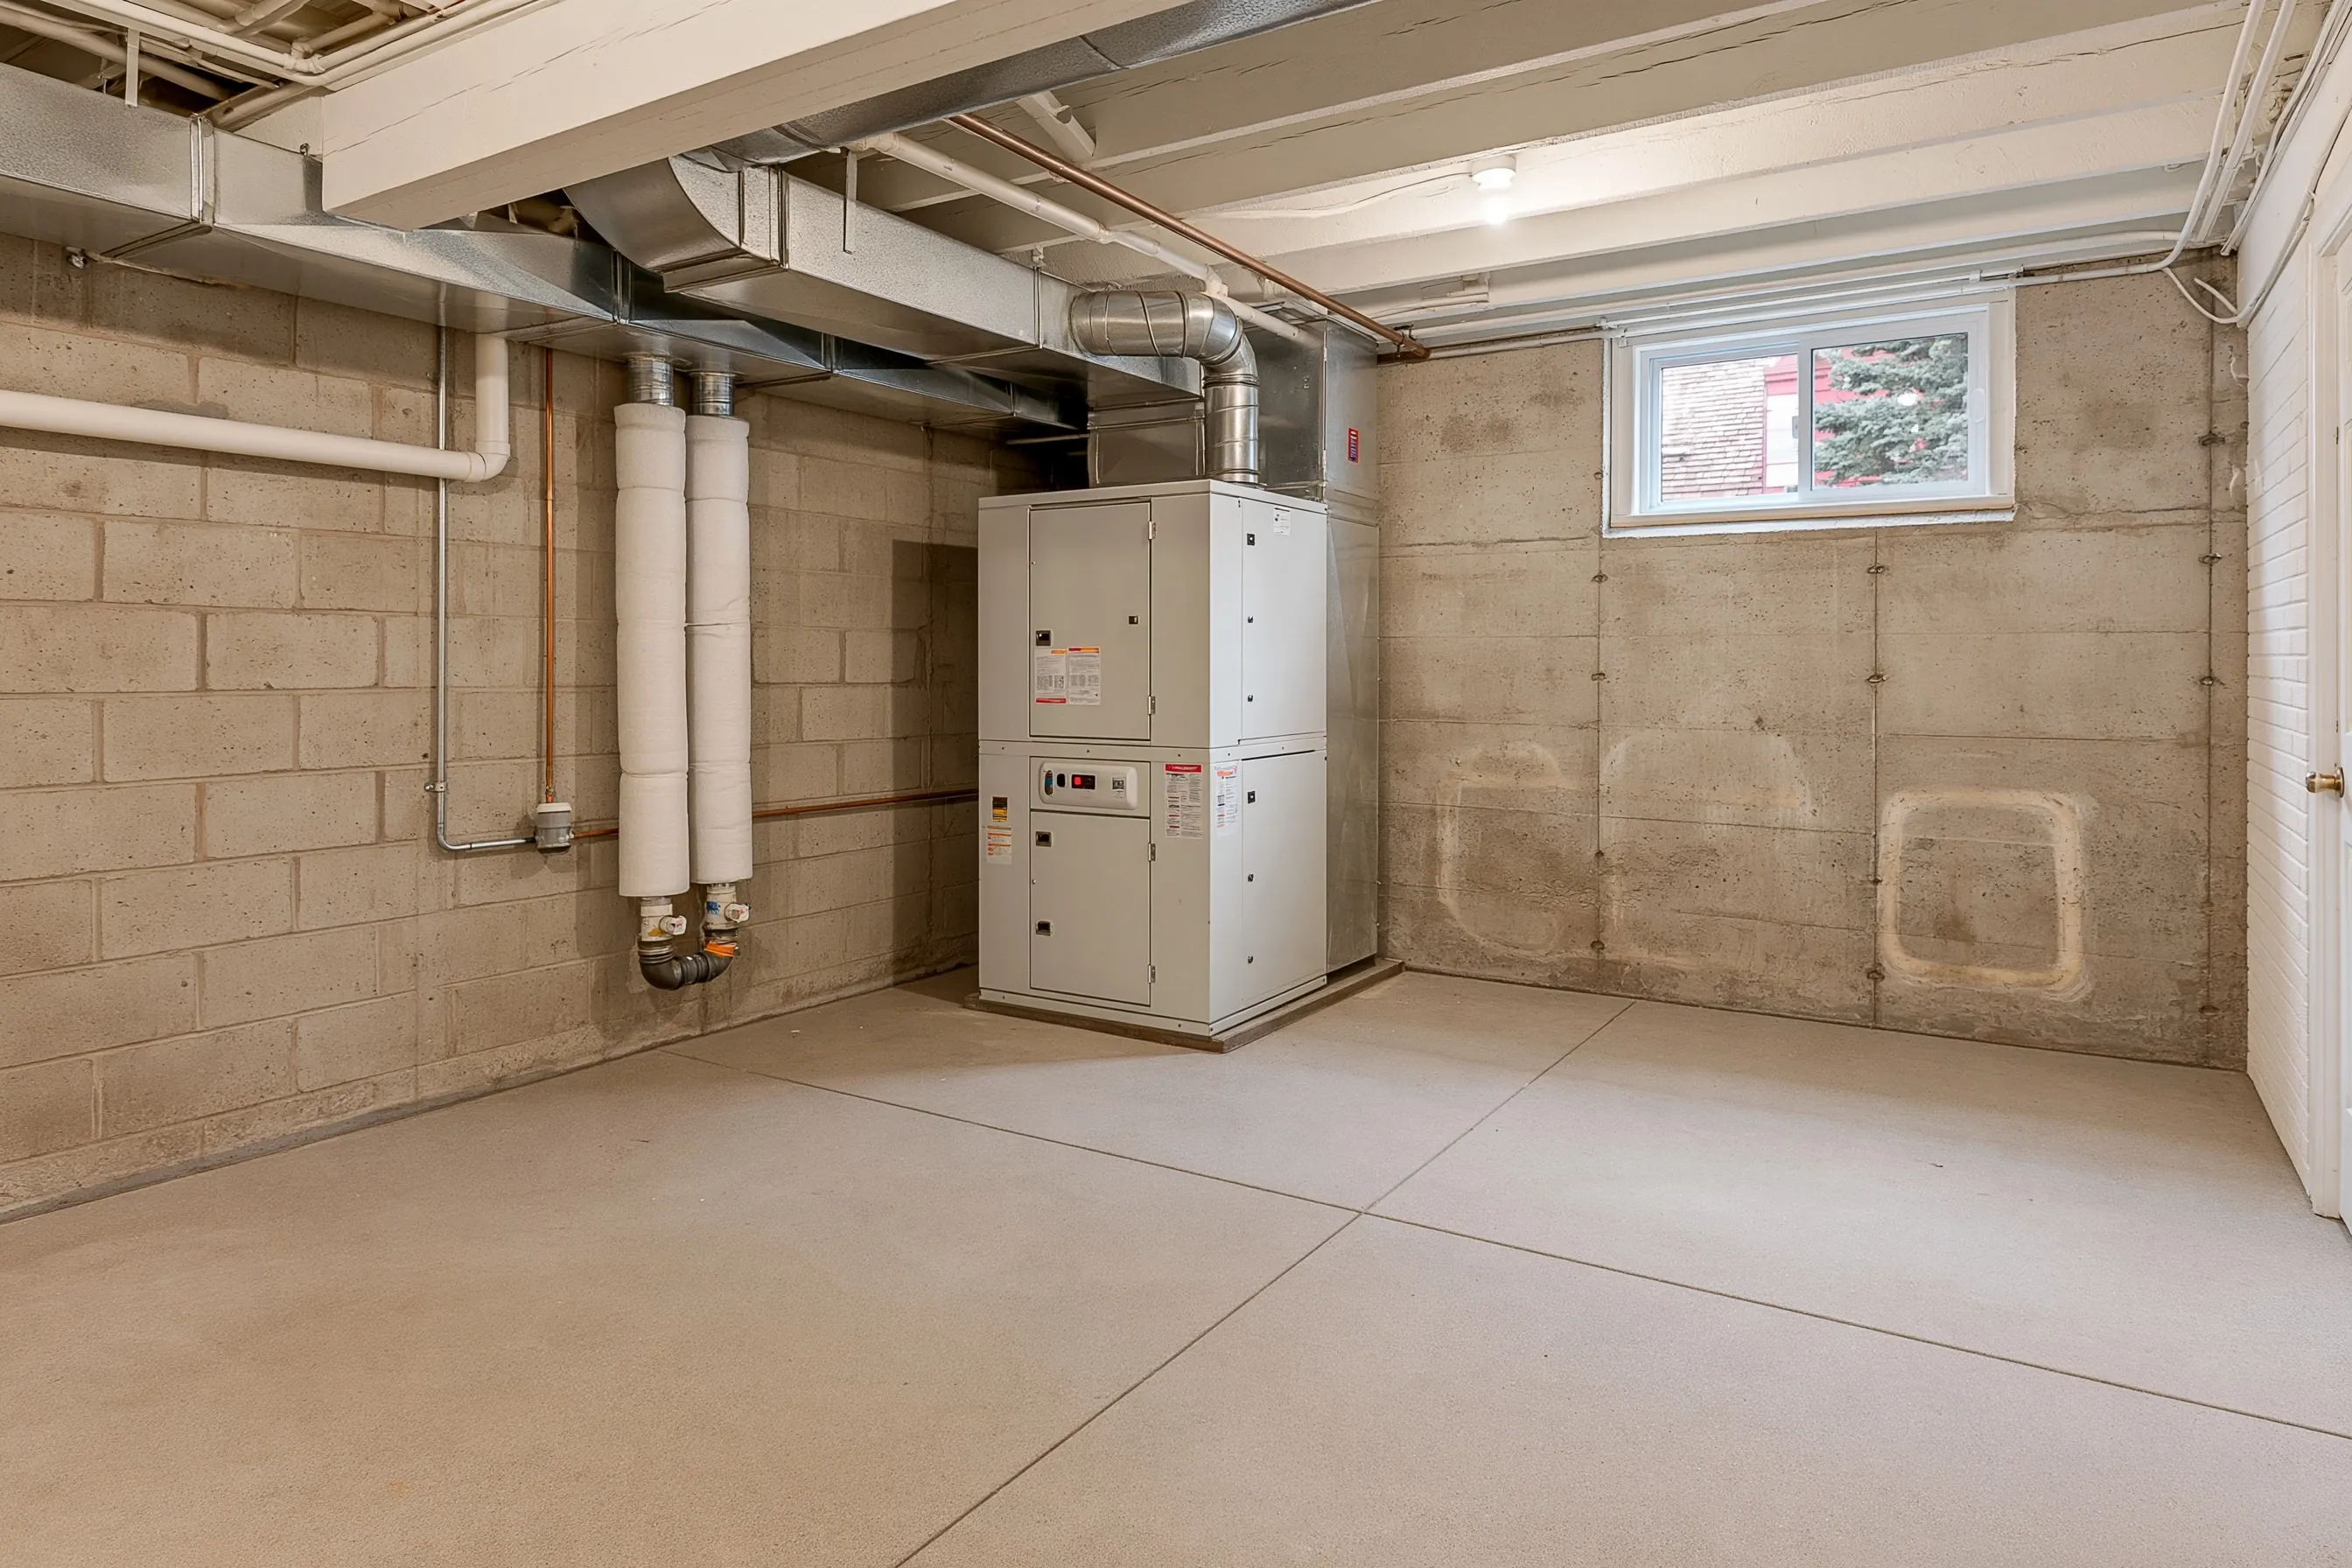
Unfinished basement with a geothermal heat pump cabinet tied into the old metal ducts, insulated loop pipes along the block wall and pale marks where the old equipment stood
Home
1950s one-story house in Everett with a basement, about 1,700 sq ft
Original request
Replace a worn oil furnace and add cooling for summer
Existing system
Oil furnace with ducts to every room
Loop
Two vertical bores in the back yard, about 250 ft each, as set by the loop design
Indoor work
Heat pump in the furnace spot, two duct runs made larger, a new thermostat
Timeline
About three weeks of work, after the design and the drilling notice
Estimated cost
$34,000

Scope of work

A heat loss calculation, the loop design, two vertical bores with grouted loop pipe, the pipe trenched to the house, the old furnace taken out, the heat pump set and connected to the existing ducts, two duct runs made larger, start-up and testing. Taking the old oil tank out of service is separate.

Project overview

In this example, the owners of a 1950s house in Everett have an oil furnace near the end of its life and want cooling in summer too. The house already has ducts to every room, so a geothermal heat pump that blows warm or cool air can use most of them.

The back yard is too small for trenches, so the loop goes into two vertical bores. A heat loss calculation sets the size, about 3 tons here, and shows two duct runs that are too small for the new airflow. Those two are replaced; the rest stay.

The goal

The goal is one system for heating and cooling, sized for this house and using the ducts that were already there.

Process

  1. First visit House and yard measured, ducts checked, heat loss calculated.
  2. Before drilling Loop design done and the drilling notice filed with Washington Ecology.
  3. Week one Drill rig in the back yard for two to three days; loop pipe set, grouted and trenched to the house.
  4. Week two Old furnace out, heat pump set and piped, ducts changed, wiring done.
  5. Week three Start-up, testing, the thermostat set up and a walk-through of the controls.

Planning right

  • The heat loss calculation, not the floor area, decides the size of the system.
  • An old oil tank has its own rules for taking it out of service. Plan it with the furnace removal.
  • Check the electrical panel early. A heat pump may need a new circuit.
  • Keep the drawing of the loop with the house papers before any future fence or patio.
Get a free quoteMore about geothermal heating retrofits

Vertical bores on a small lot for a 1990s two-story house

Example project

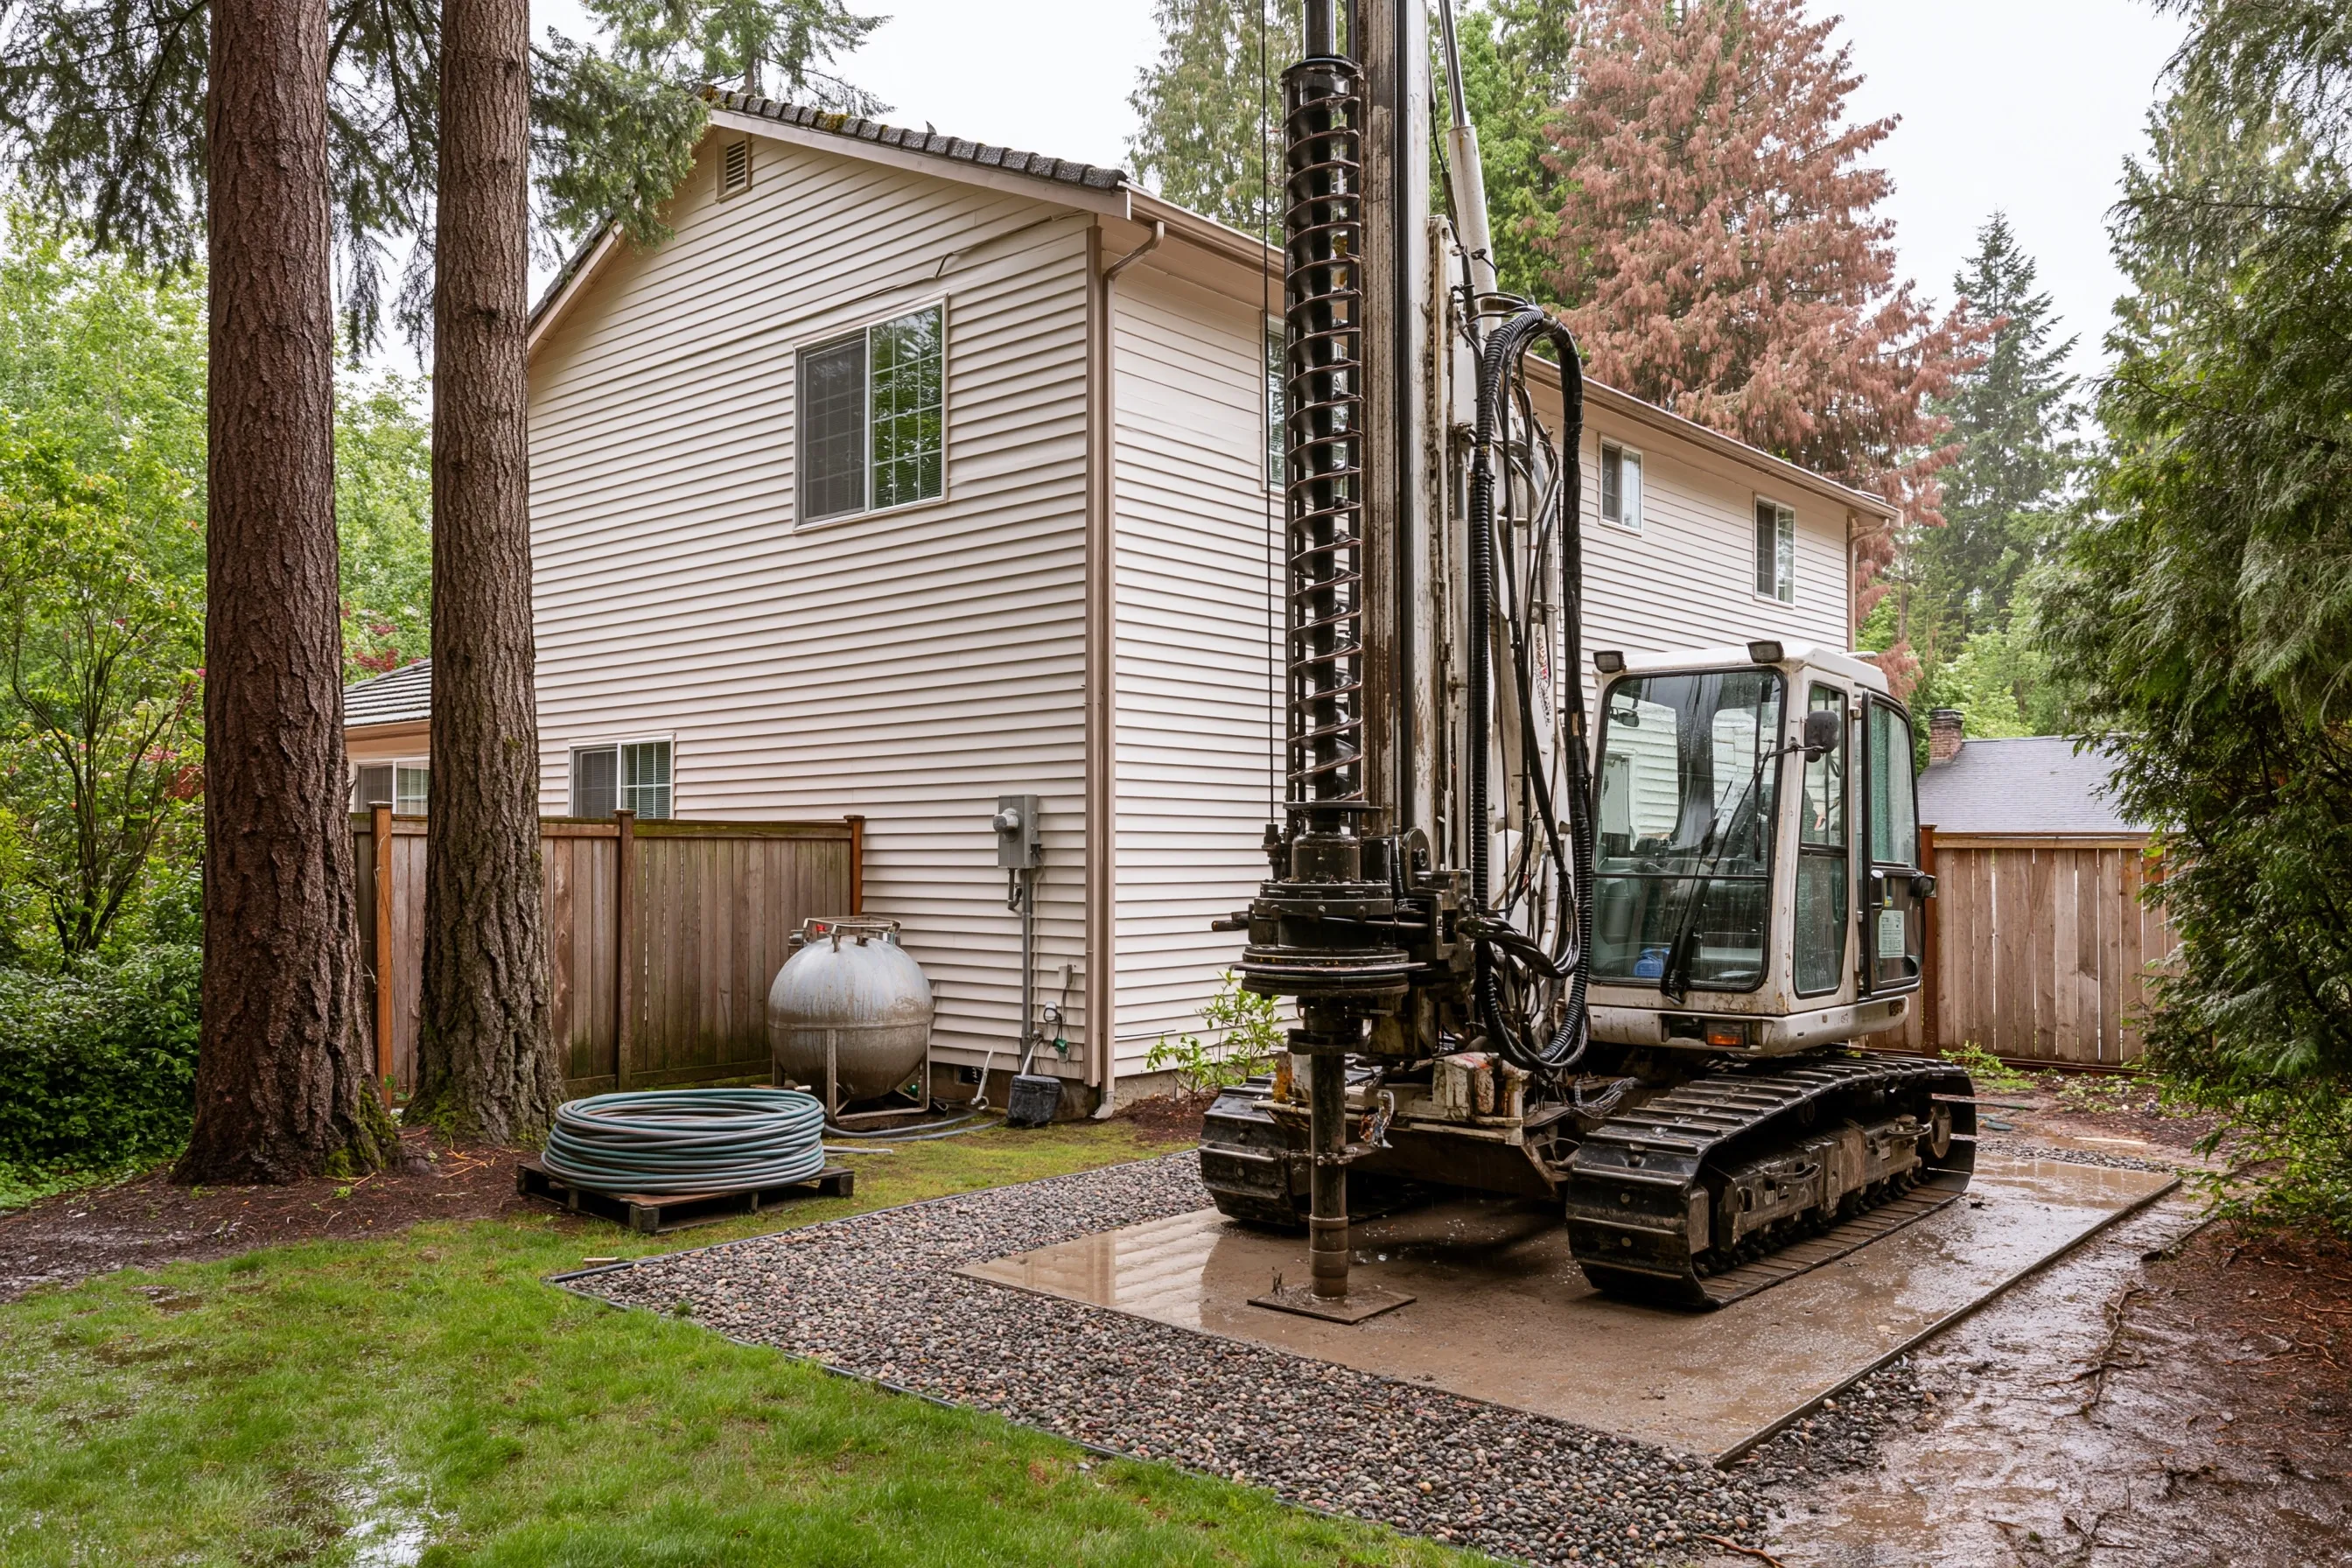
Compact tracked drill rig on a gravel pad in the narrow side yard of a two-story house with vinyl siding, a wood fence and tall evergreens
Home
1990s two-story house in Snohomish, about 2,300 sq ft
Original request
Replace a gas furnace and an air conditioner with one geothermal system
Site
A small yard with no room for trenches; the drill rig set on a gravel pad by the house
Loop
Three vertical bores, about 250 ft each, as set by the loop design
Indoor work
Heat pump in the furnace spot, connected to the existing ducts
Timeline
Three to four days of drilling; about two and a half weeks in all
Estimated cost
$43,000

Scope of work

A heat loss calculation, the loop design, three vertical bores with grouted loop pipe, the pipe run to the house, the heat pump set and connected to the existing ducts, start-up and testing, and the drilling pad cleared. Bores leave little garden damage, but garden repair is not included.

Project overview

In this example, the owners of a 1990s house on a small Snohomish lot want to replace a gas furnace and an air conditioner with one geothermal system. There is not enough open ground for trenches, so the loop goes down instead of across.

A drill rig sets up on a gravel pad beside the house and drills three bores. Loop pipe goes into each one and the space around it is filled with grout. The pipes join in a short trench to the house, where the heat pump takes the furnace’s place on the existing ducts.

The goal

The goal is one system for heating and cooling on a lot too small for trenches, with the loop out of sight.

Process

  1. First visit Heat loss calculated, yard measured, buried lines marked.
  2. Before drilling Loop design done and the drilling notice filed with Washington Ecology.
  3. Days one to four Rig on the gravel pad; three bores drilled, loop pipe set and grouted.
  4. Week two Short trench to the house, the old furnace and air conditioner out, heat pump in.
  5. Last days Start-up and testing, the pad cleared and the yard tidied.

Planning right

  • Bores need far less yard than trenches, but the rig needs a clear way in from the street.
  • Call 811 before any digging so buried lines are marked.
  • Drilling brings up mud and water. Plan where it goes before the rig arrives.
  • Keep the drawing of the bore locations for future fences, patios or additions.

Get a free quoteMore about vertical geothermal loops

Horizontal loop under the lawn of a 2010s house

Example project

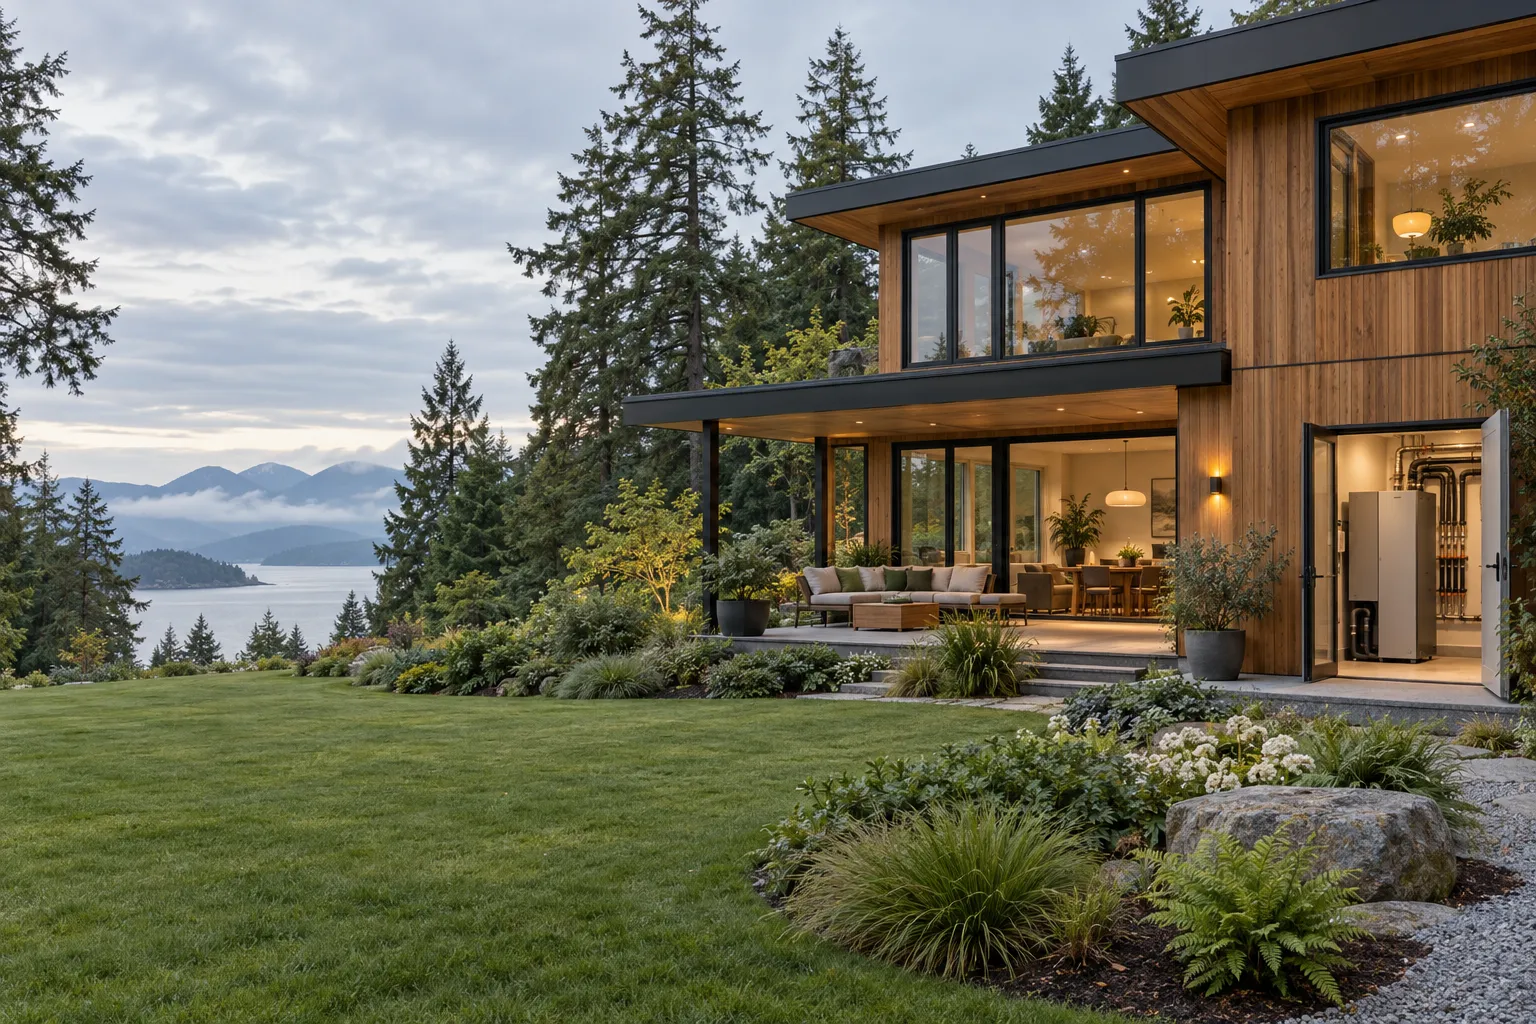
Two-story wood-clad house with a large lawn, garden beds and an open utility room door showing an indoor heat pump
Home
2010s two-story house on a large lot near Everett, about 2,400 sq ft
Original request
Replace an electric furnace with geothermal heating and cooling
Site
An open lawn beside the house, clear of trees and buried lines
Loop
Trenches about 5 to 6 ft deep across the lawn, as set by the loop design
Indoor work
Heat pump in the utility room, connected to the existing ducts
Timeline
About two weeks, then the lawn reseeded
Estimated cost
$36,000

Scope of work

A heat loss calculation, the loop design, trenches dug across the lawn, the loop pipe laid, pressure tested and backfilled, the heat pump set in the utility room and connected, start-up and testing. Reseeding and garden repair are extra.

Project overview

In this example, the owners of a 2010s house on a large lot want to replace an electric furnace with geothermal heating and cooling. The lawn beside the house is open, flat and clear of trees, which makes trenches cheaper than drilling.

The loop pipe is laid in trenches about 5 to 6 ft deep, pressure tested and buried. The lawn is torn up for a short time, so the work is timed to let the grass grow back. The heat pump goes into the utility room by the back door.

The goal

The goal is heating and cooling from one system, with the loop out of sight under the lawn.

Process

  1. First visit Heat loss calculated, the lawn measured and buried lines marked.
  2. Week one Trenches dug, loop pipe laid and pressure tested, trenches backfilled.
  3. Week two Old furnace out, heat pump in the utility room, ducts and wiring connected.
  4. Last days Start-up and testing; topsoil leveled and the lawn reseeded.

Planning right

  • Trenches need a lot of open ground. Most city lots suit bores better.
  • Keep the loop away from trees, where roots and future digging can reach it.
  • Plan the trenching for late summer or early fall so the grass can grow back before winter.
  • Ask for a drawing of where the loop runs before the lawn is reseeded.

Get a free quoteMore about horizontal geothermal loops

Geothermal floor heating in a new two-story house

Example project

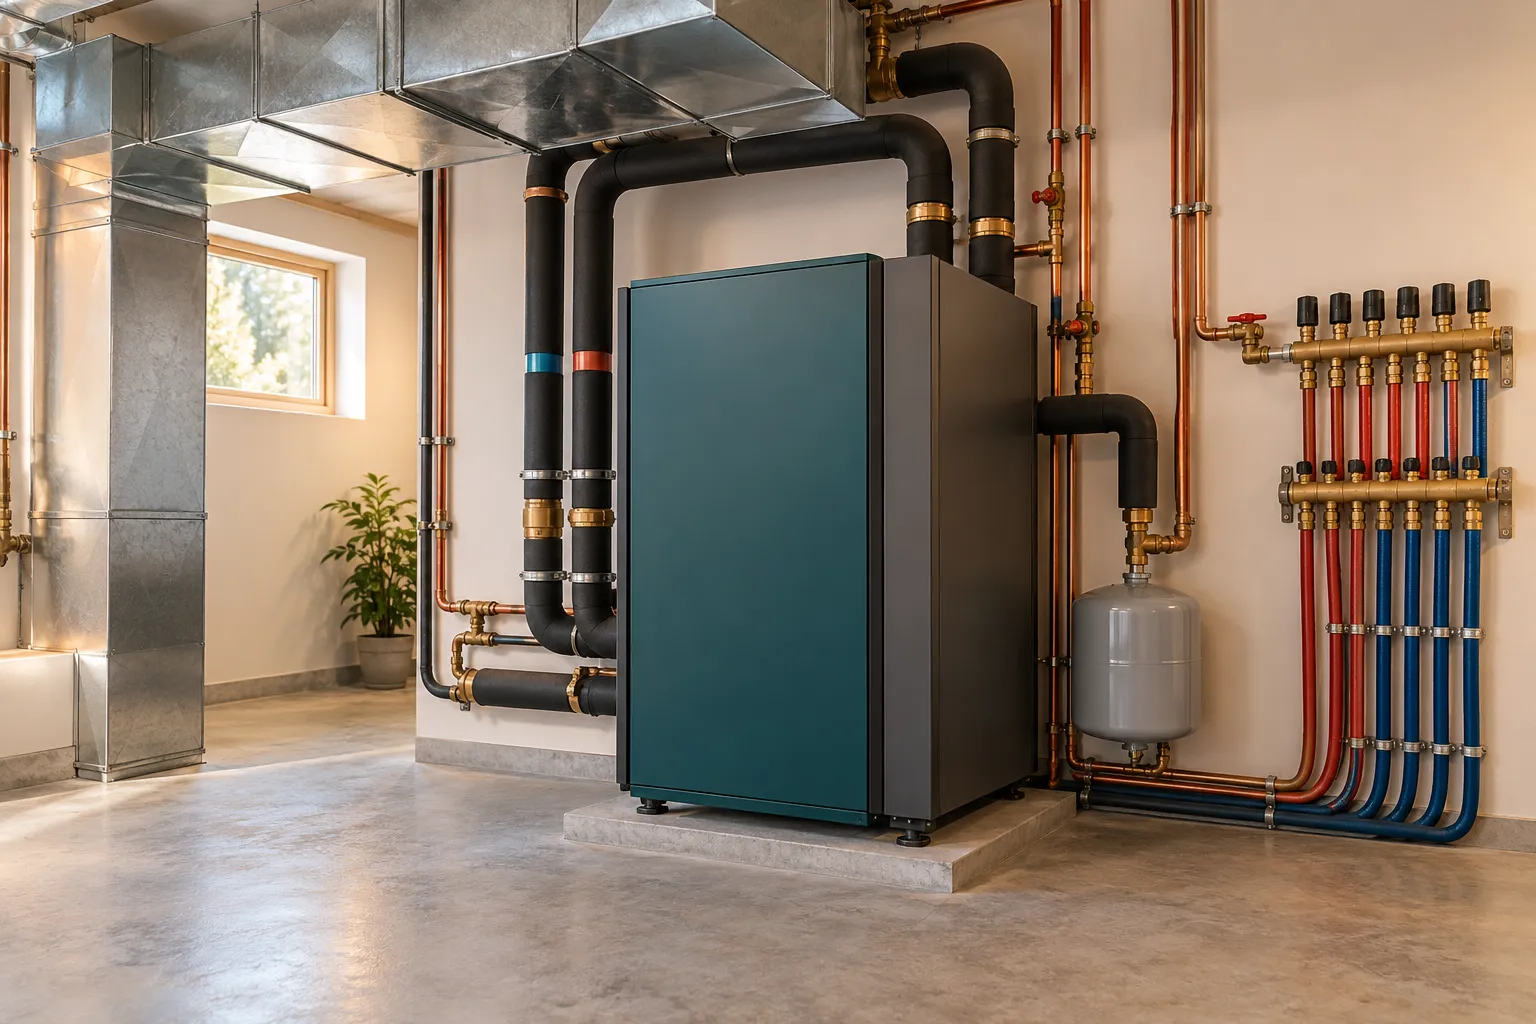
Mechanical room with a geothermal heat pump on a concrete pad, insulated pipes, an expansion tank, metal ducts and a floor heating manifold with red and blue tubing
Home
New two-story house in Monroe, about 2,000 sq ft
Original request
Heated floors in every room, planned with the build
System
Ground loop and a geothermal heat pump that heats water for the floors
Floors
Tubing in the main floor slab and under the upstairs floors, run from manifolds in the mechanical room
Mechanical room
Heat pump on a concrete pad, expansion tank, floor heating manifold and fresh-air ducts
Timeline
Loop during site work; tubing before the slab is poured and before the upstairs floors are covered
Estimated cost
$52,000

Scope of work

A room-by-room heat loss calculation, the tubing layout, the ground loop, a geothermal heat pump that heats water, manifolds, controls, start-up and balancing. Cooling, if wanted, is a separate design question.

Project overview

In this example, a family building a new two-story house in Monroe wants heated floors in every room. Because the house is still on paper, the ground loop, the heat pump and the floor tubing are all planned with the build.

The loop goes in while the site is open, and the tubing is laid before the slab is poured and before the upstairs floors are covered. A geothermal heat pump heats water for the floors. Cooling and hot water are planned separately, since floor heating alone does not cool the house.

The goal

The goal is even heat from the floors in every room, from a system sized for this house.

Process

  1. Design stage Room-by-room heat loss, tubing layout and loop design done with the house plans.
  2. Site work Ground loop put in while the site is open.
  3. Before the slab Tubing fixed in place and pressure tested before the pour.
  4. Framing stage Upstairs tubing laid under the floors, manifolds set in the mechanical room.
  5. Before move-in Heat pump connected, the system filled, started and balanced room by room.

Planning right

  • Planning floor heating before the slab is poured costs far less than adding it later.
  • Floor heating warms slowly. It suits steady, even heat more than quick changes.
  • Hard floors pass heat better than thick carpet. Choose floor coverings with the designer.
  • Take photos of the tubing before the pour, so nobody drills into it later.

Get a free quoteMore about geothermal radiant floor heating

Geothermal heating and cooling planned with a new house

Example project

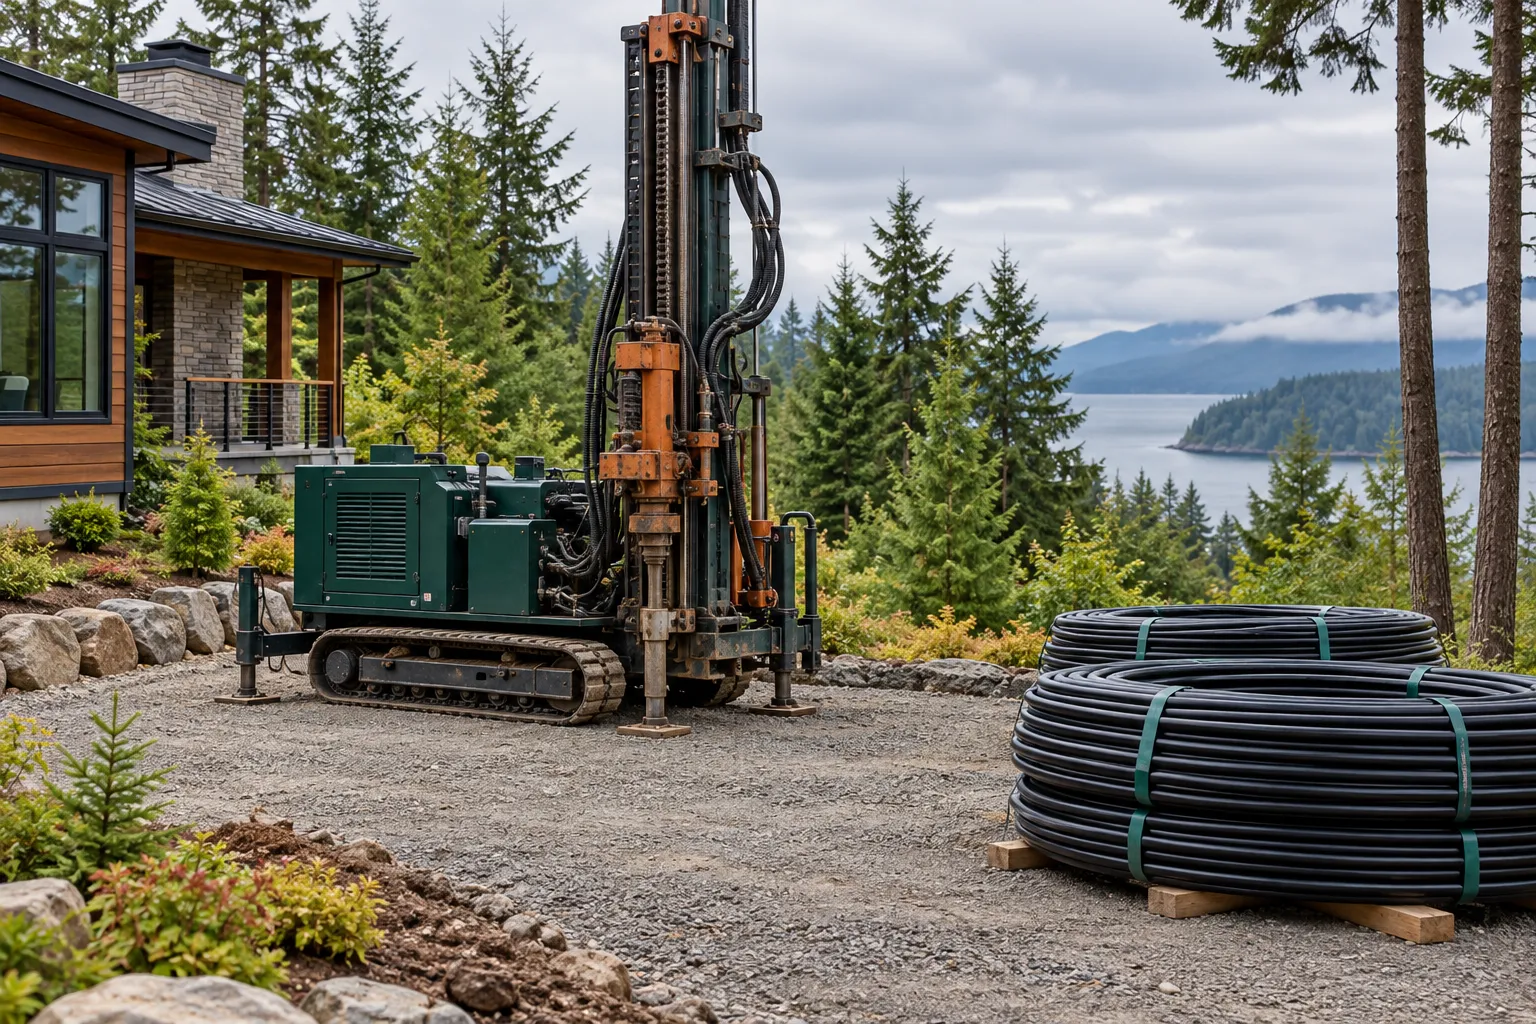
Tracked drill rig on a wide gravel area beside a new wood and stone house, with coils of black loop pipe on wooden pallets and trees, water and mountains behind
Home
New two-story house near Everett, about 2,400 sq ft, on a wooded lot with a view over the water
Original request
Geothermal heating and cooling with ducts, planned before construction
Site
A wide gravel area beside the house, where the driveway will be paved later
Loop
Vertical bores drilled in the gravel area before it is paved
Indoor work
Heat pump in a mechanical space off the garage, connected to the new ducts
Timeline
Bores during site work; heat pump set during the mechanical rough-in
Estimated cost
$29,000

Scope of work

A heat loss calculation from the house plans, the loop design, the bores drilled while the site is open, the loop pipe brought into the house, the heat pump connected to the new ducts, start-up and testing.

Project overview

In this example, the owners of a wooded lot near Everett are building a two-story house and want geothermal heating and cooling from the start. It costs less to plan it with the house. The drill rig can reach the site before the driveway is paved.

The system is sized from the house plans, and the ducts are designed for the heat pump’s airflow from the start. The bores are drilled during site work and the heat pump goes in with the rest of the mechanical work.

The goal

The goal is a new house with geothermal heating and cooling built in, sized from the plans, with the loop placed before anything covers the yard.

Process

  1. Design stage Heat loss calculated from the plans; loop and ducts designed with the house.
  2. Site work Drilling notice filed; bores drilled in the gravel area and loop pipe set before it is paved.
  3. Rough-in Loop pipe brought into the house; heat pump set and ducts connected.
  4. Before move-in Start-up, testing and a walk-through of the controls.

Planning right

  • Tell the builder early. The bores need a clear yard and the house needs a spot for the heat pump.
  • Mark the bore locations on the site plan so the driveway and landscaping avoid them.
  • Ducts sized for a heat pump work better than ducts sized for a furnace.
  • If the plans change, update the heat loss calculation. The size comes from the final design.

Get a free quoteMore about geothermal for new homes

Request a free geothermal heating quote

Tell us roughly how big the house is, how it is heated now, how much open yard you have and where the property is. We'll get back to you soon with an estimate or any questions we have. Estimates are free and there's no obligation.

Call (425) 212-1157

Call (425) 212-1157